
Can You Paint Over Stain?

Last Updated: July 4, 2019
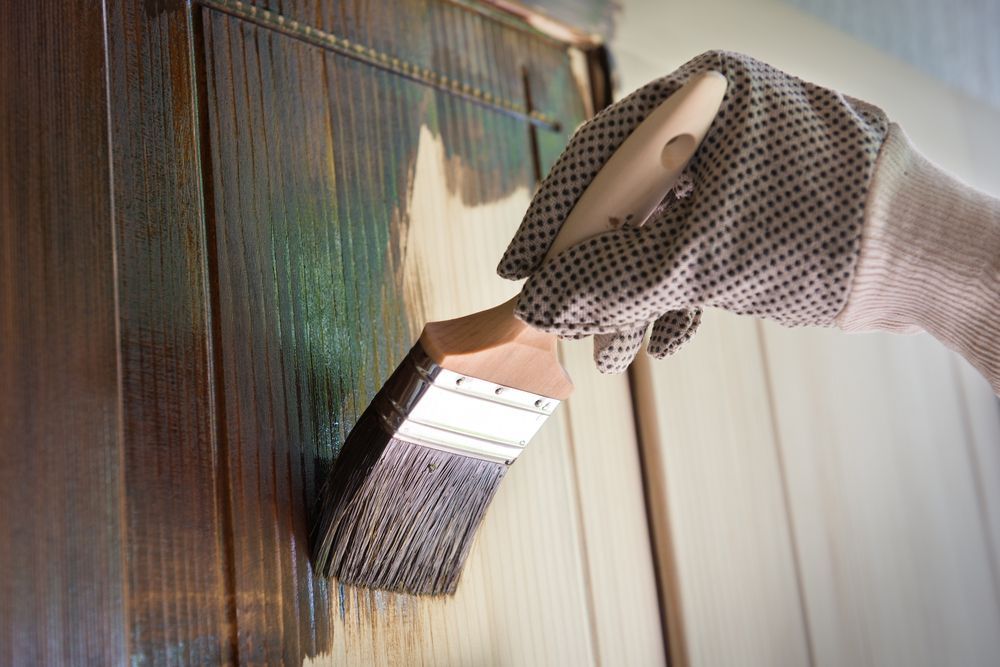
A fairly common question in the DIY/Home Improvement community is, “Can you paint over stain?” There are a lot of how-to articles and social-media posts about painting over stained wood, and while most of them have a couple of the steps correct, a lot of it is oversimplified and may actually cause you to damage your wood. The simple answer is YES! It’s somewhat unusual, but it’s definitely not brain surgery. The most important thing to realize when painting a stained piece of wood is that ALL stains bleed, and this is something that we must address. This post will walk you through painting over any stain with 5 Simple Steps!


1. Prepare the wood you are going to paint

When painting, it is always a good idea to protect the area you are painting in. Be sure to use drop clothes, and clear the area of other items before you begin. If the item is multiple pieces, this is when you want to disassemble it and safely store any hardware until this process is complete. The next step is cleaning your wood. A lot of people skip this step, but oils and dirt are going to greatly hinder the sanding process in the next step. One great choice, and arguably the industry standard, is TSP.  Follow the instructions on whatever cleaner you use and then move on to filling any chips or cracks. You can use any wood filler to fix these unsightly defects in your wood. Now, let your patches dry, and move on to step 2!


2. Degloss or sand

Here, we are trying to remove any sealers, varnishes, or other shiny coatings. You can choose to use a deglosser, or simply sand. When using deglossers, be sure to follow the directions on the bottle closely. This stuff is extremely dangerous, and can cause damage to yourself as well as your pets. It will save loads of time however, and with simple safety precautions, there is nothing to worry about! The more time-consuming, but safer option, is sanding! Start with a 120-150 grit sandpaper, and sand until the wood is smooth and no longer shiny. The amount of sanding necessary depends wholly on the state of the wood, and the amount of gloss present. If the wood was never varnished, the only thing you need to do during this step is sand down any rough bits. Time to move on to the most important step!


3. Prime the wood with a STAIN-BLOCKING primer

No matter what kind of stain or what color of stain your wood has, you MUST prime with a stain-blocking or stain-killing primer. For light stains, Kilz Original is a great choice, as it generally won’t need more than one coat. For heavier, dark stains, you’ll have to bring in the big guns. BIN White Shellac primer is a top-of-the line Primer that should cover most any stain in a single coat. When priming your wood, you MAY need to use more than one coat. If that happens to be the case, be sure to wait for each coat to dry, then sand between coats. After sanding, clean up your dust and apply the next coat! Be sure to use even brush strokes or a sprayer, as some brush strokes will be visible when the piece is complete.


4. Let’s get Caulking

Before you cleaned and primed your wood, you may not have noticed a few of the unsightly cracks that may now show up. This is when you want to use some kind of quality painter’s caulk to fill in all of these cracks! Why now, and not before sanding? Dry caulk cannot be sanded, and many of the cracks may not have been visible during that step. When caulking, use a dripping wet rag to wipe away all of the excess caulk, remove any visible water, and allow the piece to fully dry. You are finally ready to move onto what you came here for… PAINTING!


5. Paint and enjoy!

Now that you have fully prepared your wood, it is time to move on to the best part. When painting your primed wood, use as many coats as is necessary to get your desired effect. Between coats, be sure to lightly sand with a 220 grit or finer sandpaper and wipe off any dust. Continue until your piece is complete!

If you follow these simple steps, you will be able to make that old piece of furniture or newly uncovered hardwood floor look incredible! Be sure to invest in quality gear and take safety into account. While this is a safe and fun process, some of the chemicals can be quite nasty. Follow the product’s instructions and paint away!

June 30, 2026
Planning interior painting for a Portland condo or townhome? Learn color, lighting, ventilation, HOA, and scheduling tips before starting your project.
June 30, 2026
Learn why some Salem homes need more exterior paint prep due to older siding, peeling paint, moisture damage, mildew, and Oregon weather.
June 30, 2026
Learn how Eugene’s rainy season affects exterior painting, including prep, drying time, scheduling, and how professionals plan around wet weather.
June 30, 2026
Older wood siding can give a Corvallis home a lot of character, but it also needs the right care before repainting. If your siding looks faded, peeling, cracked, or weathered, paint may help restore its appearance and protection. However, older wood siding should be checked for moisture damage, failing paint, soft wood, and proper prep needs before any new coating is applied. Painting over problems does not make them go away. In many cases, the most important part of the project happens before the first coat of paint goes on. A careful inspection, thorough prep work, and the right exterior painting process can make a major difference in how long the finished result lasts. Why Older Wood Siding Needs Extra Attention Before Painting Older wood siding does not behave the same way as newer siding materials. Wood can absorb moisture, expand, contract, crack, and show signs of age in ways that are not always obvious from a distance. A home may look like it only needs fresh paint, but once the surface is cleaned and inspected, there may be soft boards, open seams, or areas where old paint is no longer bonded well. This is especially important for older homes in Corvallis and the surrounding Willamette Valley. Many houses in the area have been through years of rain, shade, damp winters, and seasonal temperature changes. Over time, those conditions can wear down paint and expose the siding underneath. Before repainting, homeowners need to know whether the siding is still sound enough to hold paint properly. How Corvallis Weather Affects Wood Siding Corvallis weather can be tough on exterior wood. Wet winters, damp spring conditions, tree cover, and moss-prone areas can all speed up paint failure. Even when a home looks fine during the drier months, moisture may have already worked its way into weak spots around trim, lower siding, windows, or shaded walls. The shaded sides of a home often show wear sooner than areas with better sunlight and airflow. North-facing walls, areas under trees, and spots near landscaping may stay damp longer after rain. That extra moisture can lead to peeling paint, mildew growth, swollen wood, and surface damage. Because of this, painting older wood siding in Corvallis is not just about choosing a new color. It is about making sure the siding is dry, stable, and properly prepared for long-term protection. Signs Your Wood Siding Needs More Than a Quick Repaint A quick repaint may improve the look of a home for a short time, but it will not solve deeper siding problems. If the paint has failed because of moisture, rot, poor prep, or damaged wood, the same issues can come back after the new paint is applied. Before repainting older wood siding, homeowners should look for signs that repairs or extra prep may be needed first. Peeling Paint That Keeps Coming Back If the same areas keep peeling year after year, there is usually a reason. Repeated peeling can point to trapped moisture, poor previous prep work, or an older coating that is no longer bonded well to the siding. Simply painting over those areas may cover the problem temporarily, but the new paint may fail again if the surface underneath is not properly scraped, sanded, primed, and prepared. Peeling paint is especially common around areas that hold moisture, such as lower walls, window trim, and shaded sides of the house. These spots should be checked carefully before repainting. Soft Wood Near Trim or Lower Siding Soft wood is a warning sign that should not be ignored. Areas near the bottom of walls, windows, doors, and trim are often more vulnerable because water can collect, splash back, or enter through gaps. If the wood feels soft, swollen, crumbly, or weakened, paint will not fix it. Damaged wood should be repaired or replaced before painting. Painting over soft or rotted wood can trap moisture and make the problem worse. It can also shorten the life of the new paint job because the coating needs a solid surface to bond to. Cracks, Gaps, and Open Seams Cracks, gaps, and open seams allow moisture to get behind the siding or into trim joints. Over time, that moisture can lead to swelling, rot, peeling paint, and more repairs. These openings may be small, but they can have a big impact on how well the siding holds up after painting. Before paint is applied, failing caulking should be removed where needed, gaps should be sealed properly, and damaged areas should be addressed. This helps create a tighter exterior surface and gives the new paint a better chance to last. Why Prep Work Matters More on Older Siding Prep work is one of the biggest factors in how long an exterior paint job lasts, especially on older wood siding. If the surface is dirty, loose, glossy, damp, or damaged, new paint will not perform the way it should. Older siding often needs more detailed preparation because it may have layers of old paint, uneven surfaces, exposed wood, or problem areas that are easy to miss. A proper prep process may include washing the siding, removing loose paint, sanding rough edges, spot priming bare wood, sealing gaps, repairing damaged boards, and making sure the surface is ready for finish coats. These steps take time, but they are what help the paint bond correctly and protect the siding longer. Skipping prep may save time upfront, but it often leads to peeling, cracking, and repainting sooner than expected. Should Older Wood Siding Be Painted or Repaired First? Paint is designed to protect sound siding, not repair damaged siding. If the wood is still in good condition, a professional exterior painting project can help restore the home’s appearance and protect it from future weather exposure. But if there is rot, water damage, loose boards, or failing trim, those problems need to be addressed before painting. A professional inspection can help homeowners understand what the siding actually needs. Some homes only need minor repairs, targeted scraping, priming, and repainting. Others may need board replacement, trim repair, or more detailed prep before paint can be applied. Knowing this ahead of time helps avoid wasting money on a paint job that will not hold up.  For Corvallis homeowners, this is especially important because moisture-related siding issues can be easy to overlook until the surface is closely inspected. Getting the condition of the siding right first helps protect both the finished look and the home itself.
June 29, 2026
Choosing a kitchen remodel contractor? Learn what to look for, which questions to ask, and how to find the right professional for your Willamette Valley kitchen renovation.
June 15, 2026
Wondering if it's time for a bathroom remodel? Discover 6 common signs, from moisture problems and outdated fixtures to poor layouts and lack of storage, and learn when a remodel is the right investment.
May 29, 2026
Is your front door trying to tell you something? Learn the common signs it may be time for a replacement, how Oregon weather affects entry doors, and how a new front door can improve comfort, security, and curb appeal.
May 21, 2026
Multi-family properties take on a lot of daily wear. Residents move in and out, shared spaces see constant foot traffic, exterior surfaces deal with Oregon weather, and small issues can become noticeable quickly when many people use the same property every day. Regular property maintenance helps protect curb appeal, reduce tenant complaints, extend the life of building surfaces, and prevent small issues from turning into expensive repairs. For property managers, apartment owners, HOA boards, and facility managers, maintenance is not just about appearance. It is about keeping the property clean, safe, consistent, and easier to manage. When the building looks cared for, tenants notice, visitors notice, and the property feels more professional from the moment someone arrives. Maintenance Shapes How Tenants and Visitors See the Property People often form an opinion about a property before they ever step inside a unit. Clean walkways, fresh paint, maintained entries, and well-kept common areas can make the property feel organized and cared for. On the other hand, dirty siding, peeling paint, stained surfaces, and scuffed walls can make a property feel neglected, even if the individual units are in good shape. This matters for apartment communities, condos, HOAs, and other managed properties because first impressions affect tenant satisfaction, leasing interest, and the overall reputation of the property. A well-maintained exterior helps attract prospective renters, while clean shared spaces help current residents feel more comfortable where they live. Small Signs of Wear Can Become Bigger Problems A few scuffed walls, dirty entries, or peeling paint may not seem urgent at first. However, when these issues are left alone, they can make the entire property feel worn down. High-traffic areas such as hallways, stairwells, lobbies, doors, and trim often show damage first because residents, guests, vendors, and maintenance teams use them every day. Exterior surfaces also need attention, especially in the Willamette Valley where rain, moisture, moss, mildew, and seasonal changes can take a toll. Peeling paint can expose siding and trim to moisture, while dirty walkways and siding can make the property look older than it is. Routine maintenance helps property teams catch these issues early, before they become more expensive or disruptive to fix. Key Maintenance Services for Multi-Family Properties A strong maintenance plan usually includes a mix of services that protect the property inside and out. For multi-family buildings, this often includes interior painting, exterior painting, pressure washing, and scheduled maintenance painting. Each service plays a different role, but together they help keep the property clean, consistent, and tenant-ready. Interior Painting for Common Areas Common areas take a lot of daily wear. Hallways, stairwells, lobbies, shared rooms, doors, and trim can quickly collect scuffs, marks, and general wear from move-ins, foot traffic, maintenance work, and everyday use. When these areas look rough, tenants notice because they pass through them constantly. Interior repainting helps common spaces feel cleaner and better managed. It can refresh high-use areas, make hallways and entries feel brighter, and create a more consistent look across the property. For property managers, it is also a practical way to stay ahead of visible wear instead of waiting until the space feels neglected. Exterior Painting for Building Protection Exterior painting improves curb appeal, but it also helps protect the building. Painted surfaces such as siding, trim, fascia, doors, and railings are constantly exposed to weather. In the Willamette Valley, moisture can be a major concern, especially when older paint starts to crack, fade, or peel. Keeping exterior paint in good condition helps protect those surfaces while keeping the property looking consistent from one building or unit to the next. This is especially important for apartment communities, condos, and HOA-managed properties where the overall appearance of the property matters to residents, applicants, owners, and board members. Pressure Washing for Cleaner Surfaces Pressure washing is a practical way to refresh a multi-family property without taking on a major project. It helps remove dirt, mildew, algae, pollen, and buildup from siding, walkways, stairs, entries, patios, and other exterior surfaces. This can be especially helpful before painting, before leasing season, ahead of inspections, or as part of a routine maintenance schedule. Clean surfaces make the property feel fresher and more cared for. They can also help reduce slippery buildup in high-traffic exterior areas, which creates a cleaner and more comfortable environment for residents and visitors. Scheduled Maintenance Painting Scheduled maintenance painting helps property managers stay ahead of wear instead of reacting to complaints or last-minute repair needs. Rather than waiting until hallways, doors, trim, or exterior areas look worn down, a planned schedule gives the property team a clearer way to manage repainting over time. This can be especially helpful for larger properties or communities with multiple buildings. Painting can be handled in phases, high-traffic areas can be prioritized, and exterior work can be planned around weather and occupancy. For busy property managers, this removes one more thing to constantly track while keeping the property more consistently presentable.
May 12, 2026
Does composite decking get too hot in the sun? Discover what really affects deck temperature, how composite compares to wood, and smart ways Oregon homeowners can build a cooler, more comfortable outdoor space this summer.
Moss-covered rooftop with rows of weathered shingles and mountain peaks in the background
April 29, 2026
Not sure when to remove moss from your roof? Learn the best timing for Willamette Valley homes and how to avoid long-term damage.
Autumn leaves piled along a shingled roof edge and gutter on a house
April 15, 2026
How often should gutters be cleaned in the Willamette Valley? Learn the ideal schedule and signs your gutters need attention to avoid costly damage.
Sunlight shining through tall white-framed windows in a dark room
March 30, 2026
Think your windows are fine? These 6 warning signs say otherwise—and could be costing you more than you realize.
More Posts